
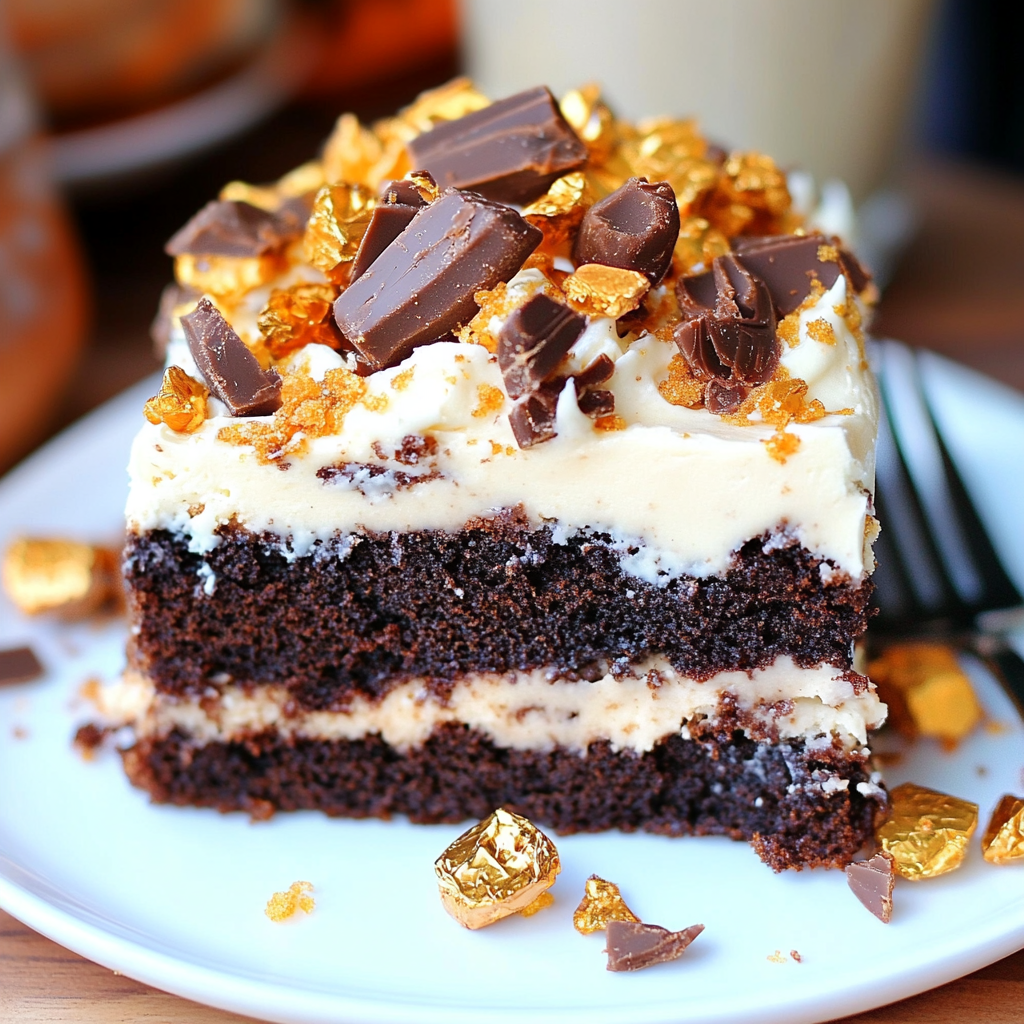
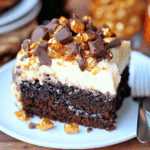
The moment you sink your fork into a slice of Butterfinger Bomb Cake, you’ll experience an explosion of flavors that dances on your taste buds like a sugar-fueled kid at a birthday party. This cake is not just a dessert; it’s a celebration of all things sweet and crunchy, layered with creamy goodness that makes every bite feel like a hug from your favorite candy bar. Imagine the sweet aroma wafting through your kitchen, teasing your senses and promising a treat that will leave everyone begging for seconds.
As I recall my first encounter with this delightful creation, I remember standing in the kitchen with my best friend during our high school years, armed with nothing but enthusiasm and a dream to recreate our favorite candy bar in cake form. Fast forward several years, and here I am, still whipping up this Butterfinger Bomb Cake for every occasion—be it birthdays, potlucks, or just because it’s Tuesday! Trust me when I say this cake will turn any ordinary day into an extraordinary one.
Why You'll Love This Recipe
- This Butterfinger Bomb Cake is incredibly easy to prepare, making it perfect for bakers of all skill levels.
- Its rich flavor profile combines chocolate and peanut butter with crunchy textures for an unforgettable dessert experience.
- The visual appeal of layers topped with crushed Butterfingers will impress guests at any gathering.
- It’s versatile enough to make for holidays or casual weeknight treats alike.
Ingredients for Butterfinger Bomb Cake
Here’s what you’ll need to make this delicious dish:
- All-Purpose Flour: Essential for providing structure to your cake; sift before measuring for best results.
- Granulated Sugar: This sweetener gives your cake its delightful sweetness; feel free to adjust based on preference.
- Baking Powder: Vital for helping the cake rise; check the expiration date to ensure freshness.
- Unsweetened Cocoa Powder: Adds rich chocolate flavor; select high-quality cocoa for the best taste.
- Salt: Enhances the sweetness of the cake; just a pinch goes a long way.
- Eggs: These bind everything together and provide moisture; use large eggs at room temperature.
- Vegetable Oil: Keeps the cake moist and tender; can be substituted with melted coconut oil if desired.
- Milk: Use whole milk or any plant-based milk alternative for added creaminess.
- Creamy Peanut Butter: The star ingredient that makes this cake oh-so-decadent; choose natural peanut butter without added sugars or oils.
For the Frosting:
- Heavy Cream: Whips beautifully to create a light frosting; ensure it’s cold before whipping.
- Powdered Sugar: Sweetens the frosting while giving it that fluffy texture we all adore.
- Creamy Peanut Butter (again): Yes, we’re using it twice because more peanut butter is always better!
- Crushed Butterfinger Bars: For topping and filling; adds that signature crunch and flavor.
The full ingredients list, including measurements, is provided in the recipe card directly below.
How to Make Butterfinger Bomb Cake
Follow these simple steps to prepare this delicious dish:
Step 1: Preheat Your Oven
Preheat your oven to 350°F (175°C). Grease two round cake pans with nonstick spray and line them with parchment paper for easy removal.
Step 2: Mix Dry Ingredients
In a large mixing bowl, whisk together flour, sugar, cocoa powder, baking powder, and salt until well combined. This dry mix will be the foundation of our fabulous cake.
Step 3: Combine Wet Ingredients
In another bowl, beat eggs until frothy. Add vegetable oil, milk, and peanut butter. Whisk until smooth and creamy—this is where magic starts happening!
Step 4: Unite Them All
Gradually add the wet mixture into the dry ingredients. Stir until no lumps remain—don’t overmix! Divide batter evenly between the prepared pans.
Step 5: Bake It Up
Bake in preheated oven for about 25-30 minutes or until a toothpick inserted comes out clean. Let cool in pans for ten minutes before transferring to wire racks.
Step 6: Frosting Time
While cakes cool completely, whip heavy cream until soft peaks form. Gradually add powdered sugar and peanut butter until fluffy. Layer frosting between cooled cakes and top generously with crushed Butterfingers.
Slice into this masterpiece and watch as everyone gathers around—trust me when I say they won’t just want one slice! Serve chilled or at room temperature for maximum enjoyment. Enjoy every crumb of this fun-filled delight!
You Must Know
- This Butterfinger Bomb Cake is not just a dessert; it’s an explosion of flavors and textures that will leave everyone wanting more.
- The combination of cake, creamy fillings, and crunchy toppings creates a visual spectacle worthy of any celebration.
- Perfect for birthdays or just because!
Perfecting the Cooking Process
To whip up this Butterfinger Bomb Cake efficiently, start by baking the cake layers first. While they cool, prepare the filling and frosting. Assemble everything once cooled for a neat and beautiful presentation.
Add Your Touch
Feel free to customize your Butterfinger Bomb Cake by using different candy bars in the filling or swapping out chocolate cake for vanilla. You can also add nuts or extra layers for added crunch.
Storing & Reheating
Store leftover Butterfinger Bomb Cake in an airtight container in the refrigerator for up to five days. For best results, enjoy chilled without reheating to maintain its texture and flavor.
Chef's Helpful Tips
- When making the cake layers, ensure they are completely cooled before assembling to avoid melting the frosting.
- Use room-temperature ingredients for better mixing and fluffier cake layers.
- Don’t skimp on the Butterfinger bits; they truly make this cake a bomb!
It reminds me of the time I made this Butterfinger Bomb Cake for my friend’s birthday. Their reaction was priceless—like I had just handed them a golden ticket to dessert heaven!
FAQs:
What ingredients are needed for Butterfinger Bomb Cake?
To make a delicious Butterfinger Bomb Cake, you will need the following ingredients: cake mix of your choice, eggs, vegetable oil, and water. For the filling, use creamy peanut butter and powdered sugar, along with crushed Butterfinger candy bars. For the frosting, gather whipped topping and additional crushed Butterfingers for garnish. If you want to add texture, consider using chopped nuts or chocolate chips. Remember to avoid any pork products or alcohol in your recipe.
How do I store leftover Butterfinger Bomb Cake?
To store leftover Butterfinger Bomb Cake properly, place it in an airtight container. This will help maintain its moisture and flavor. You can keep it in the refrigerator for up to five days. If you want to extend its shelf life further, consider freezing individual slices wrapped in plastic wrap followed by foil. Thaw the cake in the fridge overnight before serving it again for the best taste experience.
Can I make Butterfinger Bomb Cake without eggs?
Yes, you can make a delicious Butterfinger Bomb Cake without eggs! Replace each egg with a suitable substitute such as unsweetened applesauce or a flaxseed mixture (1 tablespoon of ground flaxseed mixed with 3 tablespoons of water). These alternatives will help bind your ingredients while keeping the cake moist. Make sure to adjust other measurements accordingly if needed to achieve the desired consistency.
Is there a gluten-free version of Butterfinger Bomb Cake?
Absolutely! To create a gluten-free Butterfinger Bomb Cake, simply replace regular cake mix with a gluten-free alternative made from rice flour or almond flour. Always check that all other ingredients are certified gluten-free as well. The rest of the recipe remains the same, ensuring you still enjoy that rich flavor while accommodating gluten sensitivities or preferences.
Conclusion for Butterfinger Bomb Cake:
In summary, the Butterfinger Bomb Cake is an indulgent treat that’s easy to prepare with simple ingredients like cake mix, peanut butter, and crushed candy bars. This delightful dessert is perfect for gatherings and can be customized for various dietary needs by using egg substitutes or gluten-free options. Storing leftovers is simple too; just keep them in an airtight container. Enjoy this sweet creation at your next celebration!
Butterfinger Bomb Cake
Butterfinger Bomb Cake is a mouthwatering dessert that transforms your favorite candy bar into an unforgettable cake. With layers of rich chocolate cake, luscious peanut butter filling, and a crunchy Butterfinger topping, this treat promises to impress at any gathering. Easy to make and visually stunning, it’s the perfect way to celebrate any occasion or indulge just because!
- Prep Time: 20 minutes
- Cook Time: 30 minutes
- Total Time: 50 minutes
- Yield: Serves approximately 12 people 1x
- Category: Dessert
- Method: Baking
- Cuisine: American
Ingredients
- 2 cups all-purpose flour
- 1 ½ cups granulated sugar
- 1 tsp baking powder
- ¾ cup unsweetened cocoa powder
- ½ tsp salt
- 3 large eggs
- 1 cup vegetable oil
- 1 cup whole milk
- 1 cup creamy peanut butter (divided)
- 1 cup heavy cream
- 2 cups powdered sugar
- 1 cup crushed Butterfinger bars (plus extra for topping)
Instructions
- Preheat your oven to 350°F (175°C). Grease two round cake pans and line with parchment paper.
- In a large bowl, whisk together flour, sugar, cocoa powder, baking powder, and salt.
- In another bowl, beat eggs until frothy. Add vegetable oil, milk, and half of the peanut butter; whisk until smooth.
- Gradually combine wet ingredients with dry ingredients until just mixed. Divide the batter between the prepared pans.
- Bake for 25-30 minutes or until a toothpick comes out clean. Cool in pans for 10 minutes before transferring to wire racks.
- For frosting, whip heavy cream until soft peaks form. Gradually add powdered sugar and remaining peanut butter until fluffy.
- Layer frosting between cooled cakes and top generously with crushed Butterfingers.
Nutrition
- Serving Size: 1 serving
- Calories: 350
- Sugar: 29g
- Sodium: 200mg
- Fat: 20g
- Saturated Fat: 6g
- Unsaturated Fat: 14g
- Trans Fat: 0g
- Carbohydrates: 38g
- Fiber: 2g
- Protein: 6g
- Cholesterol: 50mg

Leave a Comment