
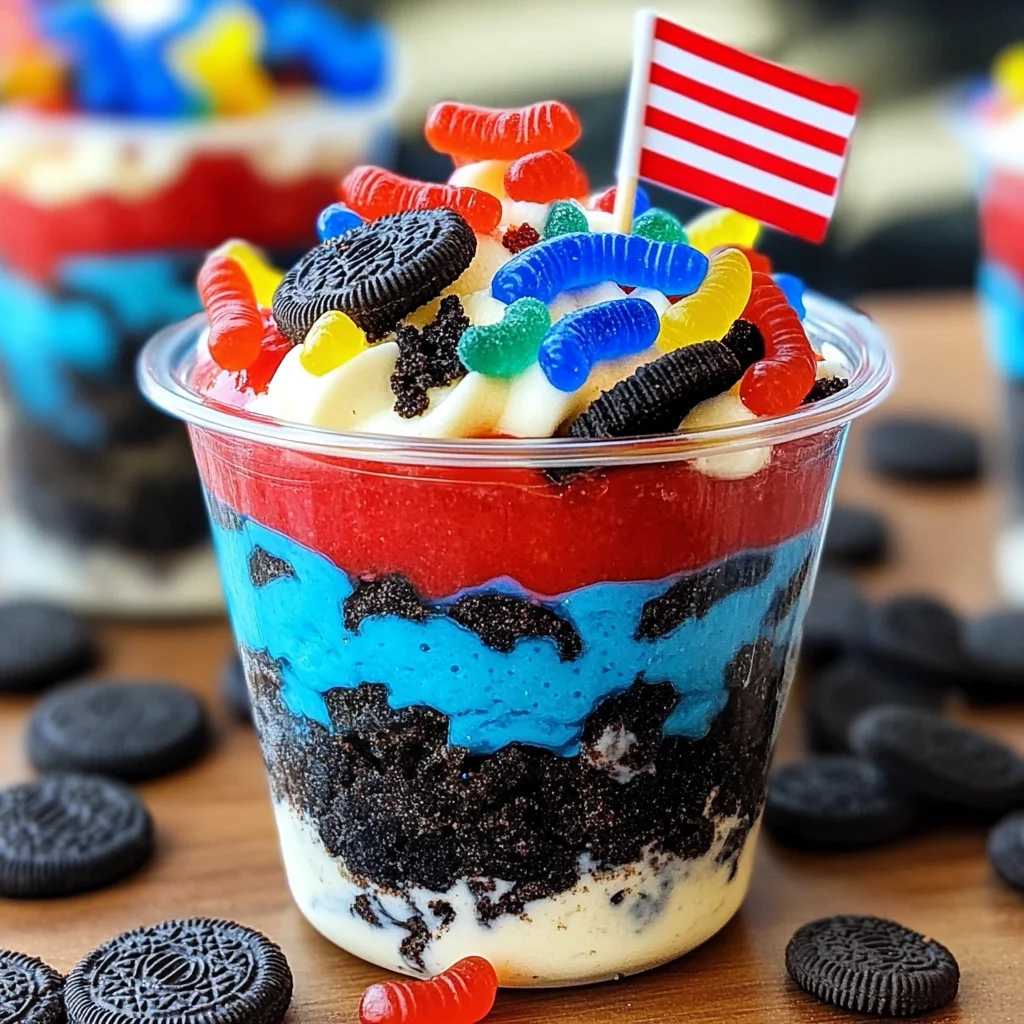
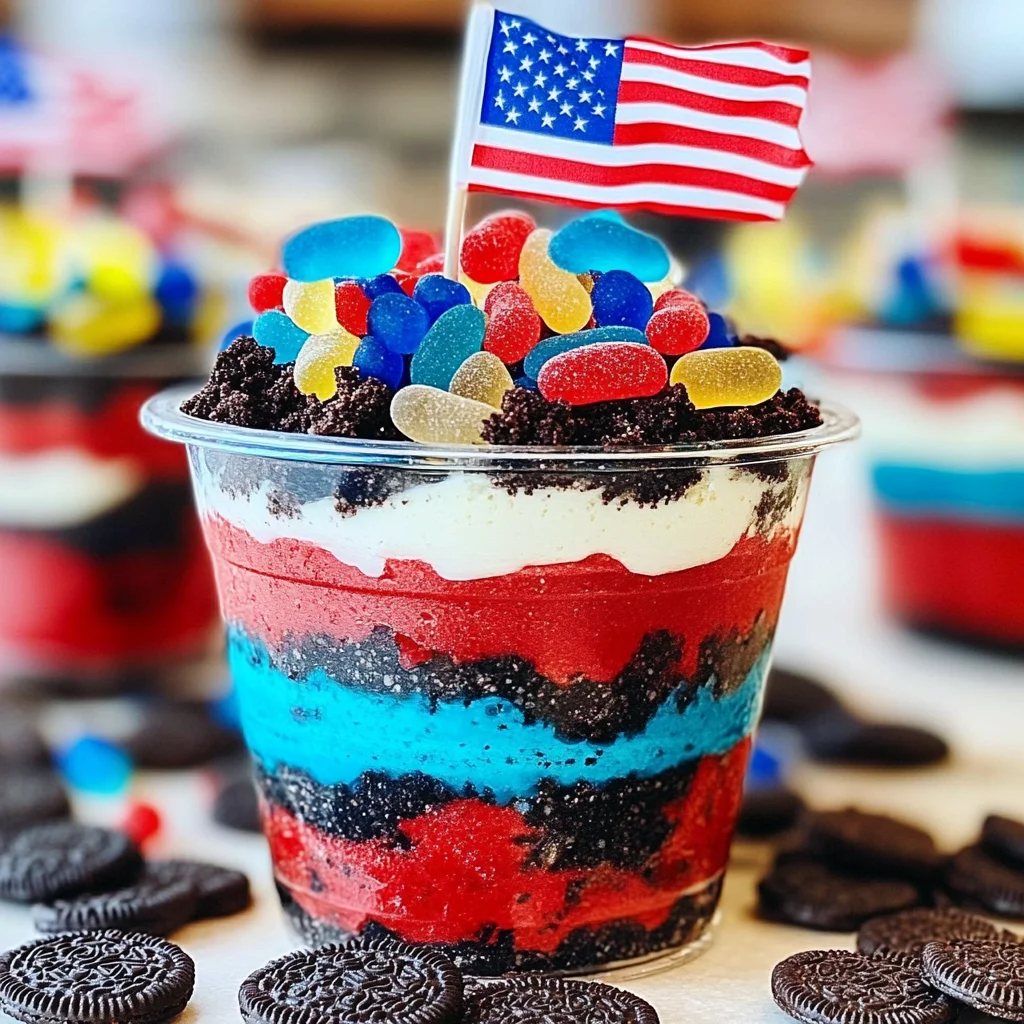
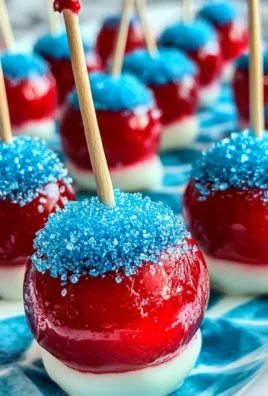
The Red White and Blue Dessert Dirt Cups are a delightful treat perfect for any festive occasion. With their vibrant layers of creamy pudding and crushed OREO cookies, these cups not only please the taste buds but also make an eye-catching centerpiece at your gatherings. Ideal for summer barbecues, Fourth of July celebrations, or family get-togethers, these cups are easy to prepare and sure to impress guests of all ages.
Why You’ll Love This Recipe
- Easy to Make: With just a few simple steps, you can whip up these delicious dessert cups in no time.
- Fun Presentation: The colorful layers and cute flag toppers create a festive display that’s perfect for celebrations.
- Customizable: You can adapt the colors and decorations to fit any occasion or theme.
- Kid-Friendly: This dessert is great for kids to help with, making it a fun family activity while they learn about cooking.
Tools and Preparation
To make your Red White and Blue Dessert Dirt Cups, having the right tools will streamline your preparation process. Here’s what you’ll need:
Essential Tools and Equipment
- Mixing bowl
- Whisk
- Measuring cups
- Serving cups
- Spatula
Importance of Each Tool
- Mixing bowl: A large bowl is essential for combining ingredients smoothly without spills.
- Whisk: This tool ensures that your pudding mixes evenly, creating a creamy texture.
- Measuring cups: Accurate measurements are crucial for achieving the right consistency in your dessert.
Ingredients
For the Pudding
- 2 Boxes Cheesecake Pudding (3.4 ounces)
- 4 Cups Milk
For the Layers
- 19 OREO Cookies, crushed
- ¼ Teaspoon Red Gel Food Dye
- ¼ Teaspoon Blue Gel Food Dye
For Garnishing
- 8 Red and Blue pectin-based gummy candies
- SUPPLIES:
- 4 Flag Toppers
- 4 Plastic Dessert Cups
How to Make Red White and Blue Dessert Dirt Cups
Step 1: Prepare the Pudding Mixture
- Empty both boxes of pudding into a large mixing bowl.
- Add the milk to the bowl.
- Whisk until the pudding thickens.
Step 2: Color the Puddings
- Separate the pudding into two bowls: pour 1 cup into one bowl and 1 ½ cups into another.
- Add blue dye to the bowl with 1 cup of pudding, stirring until uniform in color.
- Add red dye to the bowl with 1 ½ cups of pudding, stirring until uniform in color.
Step 3: Layer Your Dessert Cups
- In each plastic dessert cup, place 1 tablespoon of crushed OREO cookies at the bottom; spread evenly.
- Add 2 tablespoons of blue pudding on top; gently spread it out evenly.
- Add another tablespoon of crushed OREO cookies over the blue layer; spread evenly again.
- Next, add 3 tablespoons of white pudding as another layer; smooth it out evenly.
- Sprinkle in 1 ½ tablespoons of crushed OREO cookies as the next layer; spread evenly.
- Pour in 4 tablespoons of red pudding as your final color layer on top.
- Finish by adding 2 tablespoons of crushed OREO cookies on top for a crunchy finish.
Step 4: Garnish and Serve
- Top each dirt cup with two pectin-based gummy candies for added fun.
- Place a flag topper on each cup for decoration.
Enjoy your festive Red White and Blue Dessert Dirt Cups!
How to Serve Red White and Blue Dessert Dirt Cups
Red White and Blue Dessert Dirt Cups are a festive treat perfect for celebrations. Here are some ideas on how to present and serve them to make your event even more special.
Individual Cup Presentation
- Use clear plastic dessert cups to showcase the beautiful layers of red, white, and blue pudding. This allows guests to see the colorful layers, enhancing their excitement.
Festive Table Setting
- Arrange the cups on a red, white, and blue tablecloth. Adding coordinating napkins and plates can create a cohesive theme that ties everything together.
Garnish Ideas
- Top each cup with fresh berries or additional gummy candies for an extra burst of color and flavor. Consider using blueberries and strawberries for a fresh touch.
Flag Toppers
- Use flag toppers to enhance the patriotic theme. These can be made from paper or purchased pre-made, adding an element of fun for kids and adults alike.
How to Perfect Red White and Blue Dessert Dirt Cups
Creating the perfect Red White and Blue Dessert Dirt Cups requires attention to detail. Follow these tips for a delightful dessert every time.
-
Chill the Pudding: Allow the pudding mixture to chill for at least 30 minutes before layering. This helps it set properly, making it easier to layer without mixing colors.
-
Use Fresh Ingredients: Opt for fresh gummy candies instead of older ones for better texture and taste. This ensures a delightful chewiness in contrast to the creamy pudding.
-
Layer Carefully: When adding layers, use a spatula or spoon to spread evenly without disturbing the colors below. This maintains the vibrant look of your dessert cups.
-
Customize Flavors: Consider adding flavor extracts like vanilla or almond to the pudding mix for an extra kick. This enhances the overall taste while keeping it simple.
Best Side Dishes for Red White and Blue Dessert Dirt Cups
Pairing side dishes with your Red White and Blue Dessert Dirt Cups can elevate your meal experience. Here are some delicious options that complement this colorful dessert perfectly.
- Grilled Chicken Skewers: Marinated chicken grilled on skewers adds protein while keeping with outdoor themes.
- Coleslaw: A refreshing coleslaw offers crunch and tanginess that balances the sweetness of the dessert.
- Veggie Platter: Fresh vegetables served with dip provide a healthy contrast to the rich dirt cups.
- Potato Salad: Creamy potato salad is a classic side that pairs well with any festive gathering.
- Corn on the Cob: Grilled or boiled corn adds a sweet touch that goes wonderfully with summer parties.
- Fruit Salad: A light fruit salad can cleanse the palate between courses, offering natural sweetness.
- Caprese Skewers: Cherry tomatoes, mozzarella balls, and basil drizzled with balsamic glaze create a fresh appetizer option.
- Cheese Platter: An assortment of cheeses can add variety and richness alongside your sweet dessert cups.
Common Mistakes to Avoid
To create perfect Red White and Blue Dessert Dirt Cups, it’s essential to avoid common pitfalls.
- Overmixing the Pudding: Mixing too long can lead to a grainy texture. Whisk just until thickened for the best results.
- Ignoring Layer Order: Layering out of order can disrupt the visual appeal. Follow the recipe closely for beautiful layers.
- Not Using Gel Food Dye Properly: Failing to mix the dye thoroughly can leave streaks. Make sure there are no color streaks for vibrant layers.
- Skipping the Crushed OREO Layer: Omitting layers can affect taste and texture. Each layer contributes to the overall flavor, so don’t skip any.
- Using Incorrect Cup Sizes: Using cups that are too small can lead to overflow. Ensure your dessert cups hold enough volume for each layer.
- Rushing Cooling Time: Not allowing the pudding to set properly can ruin the dish’s consistency. Be patient and let it chill in the fridge before serving.
Storage & Reheating Instructions
Refrigerator Storage
- Store in airtight containers for up to 3 days.
- Keep in the back of the fridge where it’s coldest.
Freezing Red White and Blue Dessert Dirt Cups
- These dessert cups are not recommended for freezing as they may lose texture and flavor upon thawing.
Reheating Red White and Blue Dessert Dirt Cups
- Oven: Not recommended; these cups are best served chilled.
- Microwave: Avoid microwaving; they should be enjoyed cold.
- Stovetop: Do not reheat; serve directly from the fridge.
Frequently Asked Questions
What Are Red White and Blue Dessert Dirt Cups?
Red White and Blue Dessert Dirt Cups are fun, layered desserts featuring cheesecake pudding, crushed OREO cookies, and colorful gel dyes, perfect for celebrations.
How Long Do Red White and Blue Dessert Dirt Cups Last?
These dessert cups last up to 3 days when stored properly in the refrigerator.
Can I Customize My Red White and Blue Dessert Dirt Cups?
Absolutely! You can add fresh fruits or change the colors according to your theme while keeping the same layering technique.
What Should I Serve with Red White and Blue Dessert Dirt Cups?
These dessert cups pair well with whipped cream or fresh berries for added flavor and garnishing options.
How Do I Make Vegan Red White and Blue Dessert Dirt Cups?
To make a vegan version, substitute regular pudding with plant-based alternatives, ensuring all ingredients align with vegan preferences.
Final Thoughts
Red White and Blue Dessert Dirt Cups are a delightful treat that brings festive flair to any gathering. Their vibrant colors and creamy layers make them visually appealing while being easy to customize for different occasions. Try them out, explore various toppings, or even experiment with flavors!
Red White and Blue Dessert Dirt Cups
Elevate your summer gatherings with these delightful Red White and Blue Dessert Dirt Cups! Perfect for any festive occasion, these vibrant treats layer creamy cheesecake pudding with crushed OREO cookies, creating a visually stunning centerpiece. Easy to prepare and customizable for various themes, they’re sure to impress guests of all ages. Ideal for Fourth of July celebrations, backyard barbecues, or family reunions, these dessert cups offer a fun and interactive treat that kids can help create. Delight in the colorful layers and enjoy the delicious flavors that make these cups a must-have at your next event.
- Prep Time: 20 minutes
- Cook Time: 0 minutes
- Total Time: 20 minutes
- Yield: Makes approximately 4 servings 1x
- Category: Dessert
- Method: No bake
- Cuisine: American
Ingredients
- 2 boxes cheesecake pudding (3.4 ounces each)
- 4 cups milk
- 19 crushed OREO cookies
- ¼ teaspoon red gel food dye
- ¼ teaspoon blue gel food dye
- 8 pectin-based gummy candies for garnish
Instructions
- Prepare the pudding by mixing both boxes of pudding with milk in a large bowl until thickened.
- Divide the pudding into two bowls; color one blue and the other red using gel food dyes.
- Layer each dessert cup starting with a tablespoon of crushed OREO cookies at the bottom, followed by layers of blue pudding, more crushed cookies, white pudding, additional cookie layers, and finally red pudding topped with more crushed cookies.
- Garnish each cup with pectin-based gummy candies and flag toppers.
Nutrition
- Serving Size: 1 serving
- Calories: 320
- Sugar: 28g
- Sodium: 200mg
- Fat: 14g
- Saturated Fat: 8g
- Unsaturated Fat: 5g
- Trans Fat: 0g
- Carbohydrates: 45g
- Fiber: 1g
- Protein: 4g
- Cholesterol: 20mg

Leave a Comment