
Why You’ll Love This Recipe
Tools and Preparation
Para preparar Peras Asadas con Queso Azul, necesitarás algunas herramientas clave que facilitan el proceso y aseguran resultados perfectos.
Essential Tools and Equipment
- Bandeja para hornear
- Papel pergamino o papel aluminio
- Cuchillo afilado
- Cucharón o sacabolas
- Brocha de cocina
Importance of Each Tool
- Bandeja para hornear: Proporciona un espacio adecuado para cocinar las peras sin que se derramen los ingredientes.
- Cuchillo afilado: Facilita el corte preciso de las peras, creando mitades uniformes para una cocción óptima.
- Brocha de cocina: Permite aplicar la mantequilla derretida de manera uniforme sobre las peras.
Ingredients
For the Pears
- 4 peras maduras pero firmes (Bartlett, Anjou o Bosc)
For the Topping
- 2 cucharadas de mantequilla derretida
- ¼ taza de queso azul desmenuzado (puedes sustituir por Gorgonzola si prefieres un sabor más suave)
- ¼ taza de nueces tostadas y picadas
For the Flavor Enhancers
- 2 cucharadas de miel (más extra para decorar)
- 1 cucharada de jugo de limón fresco
- ½ cucharadita de canela en polvo (opcional)
For Garnish
- Tomillo fresco para decorar (opcional)
How to Make Peras Asadas con Queso Azul – Aperitivo Fácil y Elegante
Step 1: Preheat the Oven
Precalienta el horno a 190°C (375°F).
Step 2: Prepare the Baking Tray
Forra una bandeja para hornear con papel pergamino o aluminio para evitar que la miel se queme.
Step 3: Cut the Pears
Corta las peras por la mitad a lo largo.
Step 4: Remove the Core
Con una cuchara o un sacabolas, retira el centro y las semillas, creando una pequeña cavidad en cada pera.
Step 5: Brush with Butter and Cinnamon
Pincela las peras con mantequilla derretida y espolvorea con canela si lo deseas.
Step 6: Arrange on Baking Tray
Coloca las peras con el lado cortado hacia arriba en la bandeja.
Step 7: Bake Until Tender
Hornea por 20-25 minutos, hasta que estén tiernas y ligeramente doradas.
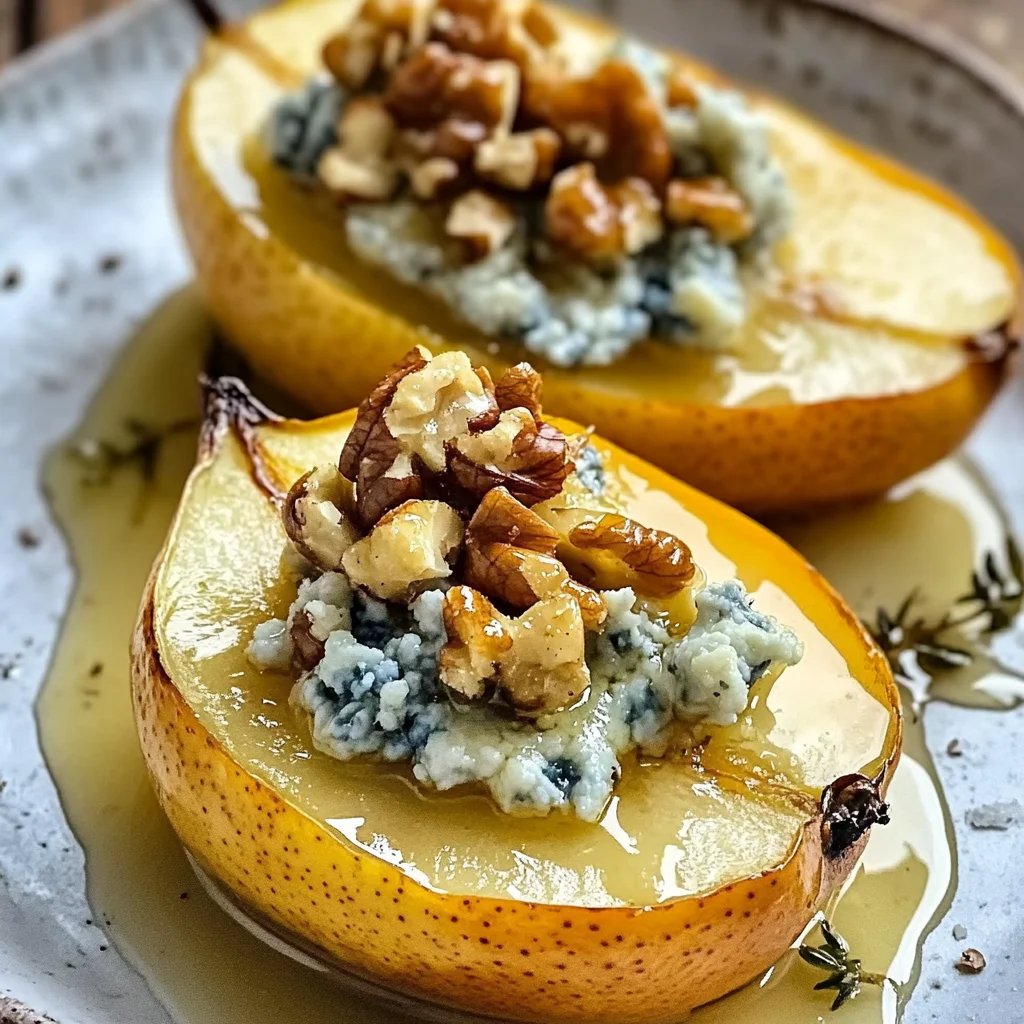
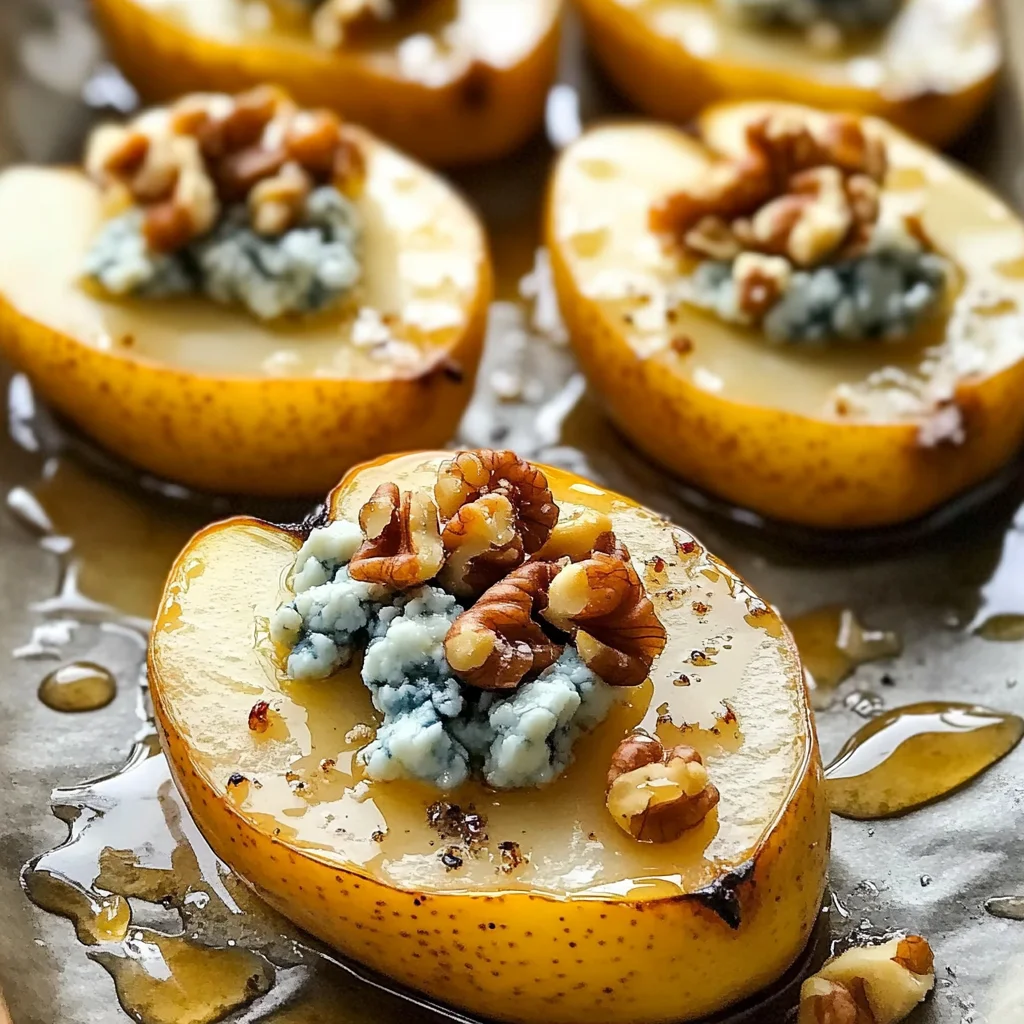
Step 8: Fill with Cheese and Nuts
Retira las peras del horno y rellena cada cavidad con queso azul y nueces picadas.
Step 9: Drizzle with Honey and Lemon Juice
Rocía con miel y unas gotas de jugo de limón para resaltar los sabores.
Step 10: Return to Oven
Regresa al horno por 5 minutos más, hasta que el queso comience a derretirse ligeramente.
Step 11: Cool Before Serving
Retira del horno y deja enfriar unos minutos.
Step 12: Garnish and Serve
Decora con tomillo fresco y un extra de miel antes de servir.
¡Disfruta tu delicioso aperitivo!
How to Serve Peras Asadas con Queso Azul – Aperitivo Fácil y Elegante
Las peras asadas con queso azul son un platillo que encanta a todos. Su combinación de sabores dulces y salados las convierte en una excelente opción para cualquier reunión o cena especial.
Con una Guarnición de Nueces Tostadas
- Añade un puñado de nueces tostadas sobre cada pera antes de servir. Esto no solo mejora la presentación, sino que también añade un toque crujiente.
Acompañadas de Ensalada Fresca
- Sirve las peras junto a una ensalada verde fresca. Los sabores ligeros de la ensalada complementan la riqueza del queso azul.
Decoradas con Miel Adicional
- Un chorrito extra de miel sobre las peras justo antes de servir aportará más dulzura y un brillo atractivo.
Con Pan Artesanal
- Ofrece rebanadas de pan artesanal al lado. El pan puede ser utilizado para absorber los jugos de las peras y el queso, creando una experiencia deliciosa.
How to Perfect Peras Asadas con Queso Azul – Aperitivo Fácil y Elegante
Para lograr el mejor sabor y textura en tus peras asadas, aquí hay algunos consejos útiles.
- Selecciona peras firmes: Escoge peras que estén maduras pero aún firmes para evitar que se deshagan durante la cocción.
- Usa mantequilla derretida: Pincelar las peras con mantequilla derretida garantiza un dorado uniforme y asegura que los sabores se fusionen mejor.
- No omitas el jugo de limón: Este ingrediente realza el sabor general del plato y ayuda a equilibrar la dulzura.
- Monitorea el tiempo de horneado: Cada horno es diferente; verifica las peras a los 20 minutos para asegurarte de que no se cocinen demasiado.
- Prueba diferentes quesos: Si prefieres un sabor más suave, puedes utilizar Gorgonzola en lugar del queso azul tradicional.
- Experimenta con hierbas: Agregar hierbas frescas como romero o albahaca puede dar un toque inesperado y delicioso.
Best Side Dishes for Peras Asadas con Queso Azul – Aperitivo Fácil y Elegante
Combinar tus peras asadas con guarniciones adecuadas puede elevar aún más tu experiencia culinaria. Aquí tienes algunas opciones:
- Ensalada César: Una ensalada clásica que combina bien gracias a su aderezo cremoso.
- Quinoa Pilaf: Este plato ligero es perfecto para equilibrar la riqueza del queso azul.
- Verduras Asadas: Zanahorias, pimientos y calabacines asados complementan muy bien los sabores de las peras.
- Puré de Patatas: Un puré cremoso puede ser una base reconfortante para disfrutar junto a las peras asadas.
- Arroz Integral: Su textura nutricia aporta un buen contraste, además es fácil de preparar.
- Brócoli al Vapor: Esta verdura verde añade frescura al plato y es muy saludable.
- Tortilla Española: Una tortilla hecha con papas y cebolla aporta sustancia sin abrumar los sabores principales.
- Batatas Asadas: Endulzan el plato mientras proporcionan una textura tierna que complementa perfectamente las peras.
Common Mistakes to Avoid
When preparing Peras Asadas con Queso Azul, it’s easy to make some common mistakes. Here are a few to watch out for:
- Overcooking the pears: This can lead to mushy fruit that loses its texture. Keep an eye on them while baking and test for doneness after 20 minutes.
- Skipping the lemon juice: Omitting lemon juice can result in a flat flavor profile. Always add it to enhance the sweetness of the pears and balance the cheese.
- Using stale nuts: Old or stale walnuts can ruin the dish’s crunchiness. Make sure your nuts are fresh and toast them just before use for maximum flavor.
- Ignoring the honey drizzle: Forgetting to drizzle honey on top before serving can mean missing out on extra sweetness. Always finish with honey for that perfect sweet touch.
- Not adjusting for personal taste: Some might find blue cheese too strong. Feel free to substitute with a milder cheese like Gorgonzola if you prefer a softer flavor.
Storage & Reheating Instructions
Refrigerator Storage
- Store leftover Peras Asadas con Queso Azul in an airtight container.
- They will last in the refrigerator for up to 3 days.
Freezing Peras Asadas con Queso Azul – Aperitivo Fácil y Elegante
- It is recommended to freeze them without the toppings (cheese and nuts) added.
- Use freezer-safe containers or bags, ensuring as much air as possible is removed, for up to 2 months.
Reheating Peras Asadas con Queso Azul – Aperitivo Fácil y Elegante
- Oven: Preheat your oven to 180°C (350°F) and bake for about 10 minutes until warmed through.
- Microwave: Place on a microwave-safe plate and heat for about 30 seconds or until warm.
- Stovetop: Heat gently over low heat in a non-stick skillet, covered, until warmed through.
Frequently Asked Questions
Here are some common questions about Peras Asadas con Queso Azul:
Can I use different types of cheese for Peras Asadas con Queso Azul?
Yes! You can experiment with various cheeses like feta or goat cheese if you want different flavors.
How do I make this recipe vegan-friendly?
For a vegan version, substitute cheese with a plant-based option and replace honey with maple syrup.
What fruits pair well with blue cheese in this recipe?
Fruits like figs, apples, or even grapes work wonderfully alongside blue cheese.
How can I customize my Peras Asadas con Queso Azul – Aperitivo Fácil y Elegante?
You can customize this dish by adding spices like cayenne pepper or using different nuts like pecans or almonds.
Can I prepare these pears ahead of time?
Yes, you can prepare the pears ahead without baking them. Just store them in the fridge until you’re ready to bake.
Final Thoughts
Peras Asadas con Queso Azul – Aperitivo Fácil y Elegante is not only a delightful appetizer but also versatile enough for any occasion. With its balance of sweetness and savory notes, this dish allows room for customization. Feel free to experiment with different cheeses or toppings to suit your taste preferences!
Peras Asadas con Queso Azul

Indulge in the exquisite flavors of Peras Asadas con Queso Azul, a refined and elegant appetizer that effortlessly marries the sweetness of roasted pears with the boldness of blue cheese. Topped with crunchy walnuts and a drizzle of honey, this dish is perfect for entertaining or enjoying a cozy night in. Its simple preparation and stunning presentation make it an ideal choice for any occasion, impressing your guests with minimal effort. Serve warm and watch as each bite delivers a delightful balance of sweet and savory notes that will leave everyone craving more.
- Prep Time: 15 minutes
- Cook Time: 30 minutes
- Total Time: 45 minutes
- Yield: Serves 4
- Category: Appetizer
- Method: Baking
- Cuisine: International
Ingredients
- 4 ripe yet firm pears (Bartlett, Anjou, or Bosc)
- 2 tablespoons melted butter
- ¼ cup crumbled blue cheese (or Gorgonzola for a milder taste)
- ¼ cup chopped toasted walnuts
- 2 tablespoons honey (plus extra for drizzling)
- 1 tablespoon fresh lemon juice
- ½ teaspoon ground cinnamon (optional)
- Fresh thyme for garnish (optional)
Instructions
- Preheat your oven to 190°C (375°F).
- Line a baking tray with parchment paper or aluminum foil.
- Halve the pears lengthwise and remove the core using a scoop.
- Brush the cut surfaces with melted butter and sprinkle with cinnamon if desired.
- Place the pears cut-side up on the tray and bake for 20-25 minutes until tender.
- Remove from oven and fill each pear cavity with blue cheese and walnuts.
- Drizzle honey and lemon juice over the pears, then return to the oven for an additional 5 minutes.
- Allow to cool slightly before serving, garnished with fresh thyme and an extra drizzle of honey.
Nutrition
- Serving Size: 1 pear half (about 130g)
- Calories: 220
- Sugar: 18g
- Sodium: 150mg
- Fat: 10g
- Saturated Fat: 4g
- Unsaturated Fat: 6g
- Trans Fat: 0g
- Carbohydrates: 32g
- Fiber: 5g
- Protein: 4g
- Cholesterol: 15mg


Leave a Comment