
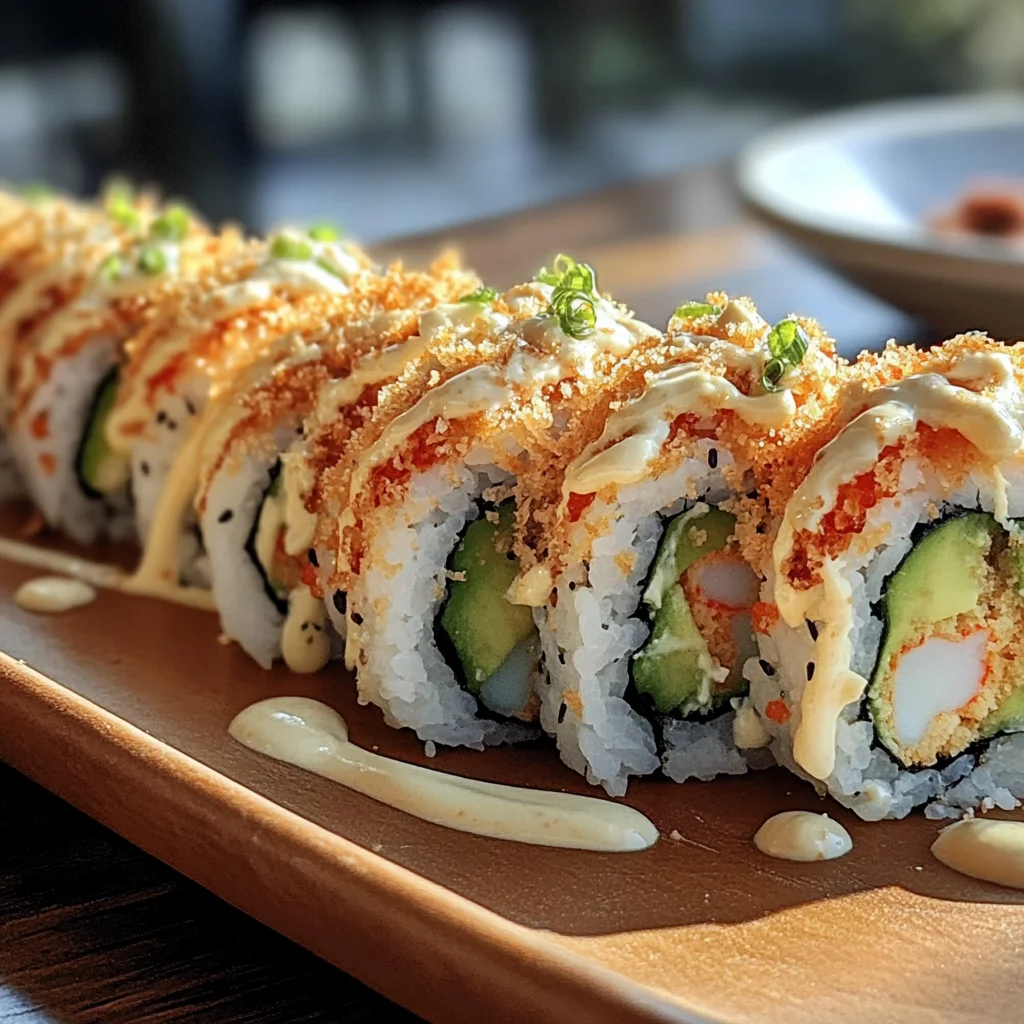
Homemade California Crunch Roll Sushi – The Best Crunchy Roll Guide (2025) is your go-to recipe for a delightful and crunchy twist on the classic California roll! This sushi is perfect for any occasion, from sushi night at home to impressing guests at a party. With creamy avocado, crisp cucumber, and sweet crab wrapped in sushi rice and nori, topped with zesty sauces and crunchy bits, this roll brings an exciting texture and flavor that everyone will love.
Why You’ll Love This Recipe
- Easy to Make: Even if you’re new to sushi-making, this recipe guides you through every step.
- Customizable Ingredients: Adjust the fillings to suit your taste or dietary preferences.
- Perfect for Sharing: Ideal for gatherings, these rolls can be sliced into bite-sized pieces for easy sharing.
- Flavor Explosion: The combination of creamy, spicy, and crunchy elements creates a unique taste experience.
- Fun Activity: Rolling sushi can be a fun activity to do with family or friends.
Tools and Preparation
Before diving into making your Homemade California Crunch Roll Sushi, gather your tools. Having everything ready will make the process smooth and enjoyable.
Essential Tools and Equipment
- Bamboo sushi mat
- Rice cooker (or pot)
- Sharp knife
- Mixing bowl
- Saucepan
Importance of Each Tool
- Bamboo sushi mat: This tool helps you roll the sushi tightly and evenly.
- Rice cooker: Ensures perfectly cooked rice every time without fuss.
- Sharp knife: A sharp blade makes slicing the rolls easier and cleaner, enhancing presentation.
Ingredients
For the Sushi Rice
- 1 cup short-grain white rice
- 1¼ cups water
- 2 tbsp rice vinegar
- 1 tbsp sugar
- ½ tsp salt
For the Filling
- 4 roasted nori sheets (sushi-grade)
- 1 cup imitation crab (or real crab meat)
- 1 ripe avocado, sliced
- 1 small cucumber, cut into thin strips
For the Toppings
- 2 tbsp spicy mayo (mayo + sriracha)
- 1 tbsp eel sauce
- ½ cup toasted panko breadcrumbs or French fried onions
- Cream cheese strips
- Thinly sliced jalapeño
- Teriyaki glaze
How to Make Homemade California Crunch Roll Sushi – The Best Crunchy Roll Guide (2025)
Step 1: Prepare the Rice
- Rinse the rice under cold water until it runs clear to remove excess starch.
- Cook the rice with water in a rice cooker or on the stovetop until tender.
- In a saucepan over low heat, mix vinegar, sugar, and salt until dissolved.
- Gently fold this mixture into the warm rice and let it cool.
Step 2: Set Up Your Rolling Station
- Wrap your bamboo sushi mat in plastic wrap for easy cleanup.
- Place a bowl of water mixed with vinegar nearby to keep your hands moist while rolling.
Step 3: Assemble the Roll
- Lay a sheet of nori shiny side down on the prepared mat.
- Spread an even layer of cooled sushi rice over the nori, leaving about ½ inch at the top edge.
- Carefully flip the nori so that the rice is facing down towards you.
- Layer imitation crab, avocado slices, cucumber strips, and any additional fillings across the center of the nori.
Step 4: Roll the Sushi
- Using your thumbs, lift the edge of the mat while holding down the filling with your fingers.
- Roll tightly into a cylinder shape while sealing the edge of the nori with a bit of water.
- Use the mat to press gently but firmly to shape it well.
Step 5: Add the Crunch
- Brush the top of your roll with spicy mayo or eel sauce for added flavor.
- Generously sprinkle panko breadcrumbs or fried onions over it for that desired crunch.
- Lightly press down with your mat to secure these toppings in place.
Step 6: Slice and Serve
- Use a sharp knife dipped in water to slice your roll into 8 equal pieces.
- Drizzle extra sauce if desired for additional flavor.
- Serve with soy sauce, pickled ginger, and wasabi for an authentic touch.
Enjoy crafting this delicious Homemade California Crunch Roll Sushi – The Best Crunchy Roll Guide (2025) that everyone will rave about!
How to Serve Homemade California Crunch Roll Sushi – The Best Crunchy Roll Guide (2025)
Serving your Homemade California Crunch Roll Sushi is just as important as making it. Presentation and pairing can elevate the experience for everyone at your sushi night.
Pair with Soy Sauce
- A classic accompaniment to enhance the flavors of the sushi roll. Use low-sodium soy sauce for a healthier option.
Add Pickled Ginger
- This tangy condiment cleanses the palate between bites, making each taste more enjoyable.
Include Wasabi
- For those who love heat, wasabi adds a spicy kick that complements the sushi beautifully.
Serve with Extra Spicy Mayo
- Drizzle extra spicy mayo over the rolls or serve on the side for dipping. It adds creaminess and heat to every bite.
Garnish with Sesame Seeds
- A sprinkle of toasted sesame seeds adds a nice crunch and nutty flavor, enhancing the visual appeal of your sushi.
Present on a Bamboo Board
- Using a bamboo sushi board or platter not only looks authentic but also brings a rustic charm to your dining table.
How to Perfect Homemade California Crunch Roll Sushi – The Best Crunchy Roll Guide (2025)
Perfecting your sushi rolls takes practice and attention to detail. Here are some tips to help you achieve that ideal crunch and flavor harmony.
-
Use Short-Grain Rice: This type of rice is stickier and holds together better, making rolling easier.
-
Keep Your Hands Wet: Dipping your fingers in water prevents rice from sticking to your hands while assembling rolls.
-
Don’t Overfill: Less is more! Using too much filling can make rolling difficult and lead to messy sushi.
-
Roll Tightly: Ensure you roll firmly without crushing the ingredients. A tight roll keeps everything intact when slicing.
-
Sharp Knife for Slicing: Use a sharp knife dipped in water when cutting rolls. This prevents tearing and ensures clean slices.
-
Experiment with Fillings: Don’t hesitate to try different combinations of vegetables or proteins for variety in flavors and textures.
Best Side Dishes for Homemade California Crunch Roll Sushi – The Best Crunchy Roll Guide (2025)
Pairing side dishes with your sushi can enhance the meal. Here are some great options that complement your Homemade California Crunch Roll Sushi perfectly.
-
Edamame: Lightly salted steamed edamame pods provide a protein-rich snack that balances out the meal.
-
Seaweed Salad: This refreshing salad offers a unique texture and flavor that pairs well with sushi.
-
Miso Soup: A warm bowl of miso soup serves as a comforting start to your meal, adding an umami kick.
-
Cucumber Salad: Thinly sliced cucumbers tossed in rice vinegar create a light, crunchy side that complements sushi nicely.
-
Tempura Vegetables: Crispy tempura vegetables add an extra crunch factor that pairs wonderfully with soft sushi rolls.
-
Pickled Vegetables: A variety of pickled veggies enhances flavors and adds tanginess to balance out rich ingredients in the sushi.
-
Fried Rice: A small serving of vegetable fried rice makes for a hearty side dish that can satisfy hunger while enjoying sushi.
-
Fruit Platter: Fresh fruit like mango, pineapple, or berries can provide a sweet contrast to savory flavors in your meal.
Common Mistakes to Avoid
Making sushi at home can be fun, but it’s important to avoid common pitfalls for the best results.
- Lack of Preparation: Failing to prepare all ingredients before starting can lead to a chaotic rolling process. Always gather and prep your ingredients before you begin assembling your sushi.
- Overcooking the Rice: Cooking rice too long can make it mushy. Follow the cooking time precisely and let it cool properly for perfect sushi rice.
- Using the Wrong Nori: Not all nori is created equal. Always choose high-quality, sushi-grade nori for better flavor and texture.
- Rolling Too Tightly: Rolling too tightly can cause the filling to spill out. Use gentle pressure when rolling, ensuring the ingredients stay intact.
- Neglecting Seasoning: Skipping seasoning on the rice can result in bland sushi. Make sure to mix vinegar, sugar, and salt into the rice for added flavor.

Storage & Reheating Instructions
Refrigerator Storage
- Duration: Store sushi in the fridge for up to 24 hours.
- Containers: Use an airtight container to keep rolls fresh and prevent drying out.
Freezing Homemade California Crunch Roll Sushi – The Best Crunchy Roll Guide (2025)
- Duration: Freeze for up to one month for best quality.
- Containers: Wrap individual rolls tightly in plastic wrap, then place them in a freezer-safe bag or container.
Reheating Homemade California Crunch Roll Sushi – The Best Crunchy Roll Guide (2025)
- Oven: Preheat to 350°F (175°C) and heat wrapped rolls for about 10 minutes until warm.
- Microwave: Place sushi on a microwave-safe dish; heat on medium power for about 30-45 seconds.
- Stovetop: Heat a skillet over low heat and warm the rolls, turning occasionally until heated through.
Frequently Asked Questions
Here are some common questions about making Homemade California Crunch Roll Sushi.
How do I make homemade sushi without raw fish?
You can use imitation crab or cooked shrimp as tasty alternatives. This keeps your sushi flavorful and safe to eat.
What is the best way to slice my sushi rolls?
Use a sharp, damp knife to slice through your rolls cleanly. This prevents tearing and maintains the roll’s shape.
Can I customize my Homemade California Crunch Roll Sushi?
Absolutely! Feel free to add other fillings like cream cheese, jalapeños, or even different vegetables according to your taste preferences.
How do I serve my crunchy rolls?
Serve with soy sauce, pickled ginger, wasabi, and any extra sauces like teriyaki glaze or eel sauce for added flavor.
How do I store leftover sushi?
Wrap leftover rolls tightly in plastic wrap and store them in an airtight container in the refrigerator for up to 24 hours.
Final Thoughts
Homemade California Crunch Roll Sushi is a delightful dish that combines flavors and textures beautifully. With its creamy avocado and crispy topping, this recipe is versatile and perfect for customizing with your favorite ingredients. Try it today for a fun sushi night at home!
Homemade California Crunch Roll Sushi – The Best Crunchy Roll Guide (2025)

Experience a delightful twist on the classic California roll with this Homemade California Crunch Roll Sushi – The Best Crunchy Roll Guide (2025). Perfect for family sushi nights or impressing guests, this recipe combines creamy avocado, crisp cucumber, and sweet crab wrapped in sushi rice and nori. Topped with a zesty spicy mayo and crunchy panko breadcrumbs, each bite offers an explosion of flavors and textures. Whether you’re a sushi novice or a seasoned pro, this guide ensures you’ll master the art of rolling sushi at home. Enjoy the fun of creating your own delicious rolls with customizable ingredients that cater to any taste!
- Prep Time: 30 minutes
- Cook Time: 20 minutes
- Total Time: 50 minutes
- Yield: Serves 8
- Category: Dinner
- Method: Rolling
- Cuisine: Japanese
Ingredients
- 1 cup short-grain white rice
- 1¼ cups water
- 2 tbsp rice vinegar
- 1 tbsp sugar
- ½ tsp salt
- 4 roasted nori sheets
- 1 cup imitation crab
- 1 ripe avocado, sliced
- 1 small cucumber, cut into thin strips
- 2 tbsp spicy mayo (mayo + sriracha)
- 1 tbsp teriyaki glaze
- ½ cup toasted panko breadcrumbs
- Cream cheese strips
- Thinly sliced jalapeño
Instructions
- Rinse rice under cold water until clear; cook in a rice cooker or pot with water.
- In a saucepan, mix vinegar, sugar, and salt over low heat until dissolved; fold into warm rice and cool.
- Prepare your bamboo mat with plastic wrap; keep a bowl of water nearby.
- Place nori shiny side down on the mat; spread cooled rice evenly across, leaving a top edge.
- Flip nori so rice faces down; layer fillings (imitation crab, avocado, cucumber) in the center.
- Roll tightly using the mat; seal edges with water.
- Brush top with spicy mayo; sprinkle panko breadcrumbs on top and press gently to secure.
- Slice rolls with a wet knife into pieces and serve.
Nutrition
- Serving Size: 1 roll (approx. 75g)
- Calories: 210
- Sugar: 2g
- Sodium: 200mg
- Fat: 9g
- Saturated Fat: 2g
- Unsaturated Fat: 6g
- Trans Fat: 0g
- Carbohydrates: 29g
- Fiber: 2g
- Protein: 6g
- Cholesterol: 20mg


Leave a Comment